어떤 엑셀 프로그램은 기본 리본바가 아닌 다양한 형태의 리본바를 가지고 있는 엑셀파일들이 존재한다. 사용자리본정의를 통해 만들어진 것은 모든 엑셀파일을 열때 동일하게 적용이 되는데, 이런 방식말고 내가 만든 특정 엑셀 파일에만 별도의 리본바가 보이도록 엑셀 파일을 만들고 싶었다. 열심히 구글링 해서 찾은 것이 다음의 웹사이트이다.
https://www.macexcel.com/examples/ribbonpages/
Ribbon Pages | Mac Excel Automation
Ribbon pages for Mac Excel
macexcel.com
이 방식은 압축되어 있는 엑셀파일 안에 customUI14.xml를 편집하여 저장을 하면 리본바를 원하는 형태로 변경할 수 있다. 엑셀파일의 customUI14.xml을 손쉽게 변경하기 위해서는 Office RibbonX Editor를 다운받아서 사용한다.
https://github.com/fernandreu/office-ribbonx-editor/releases/tag/v1.9.0
Release Office RibbonX Editor 1.9.0 (Build 1056) · fernandreu/office-ribbonx-editor
Released automatically from Azure Pipelines What's New This release adds translations for Dutch, French, German and Turkish. Thanks a lot to all the translators so far! The .NET versions of the too...
github.com
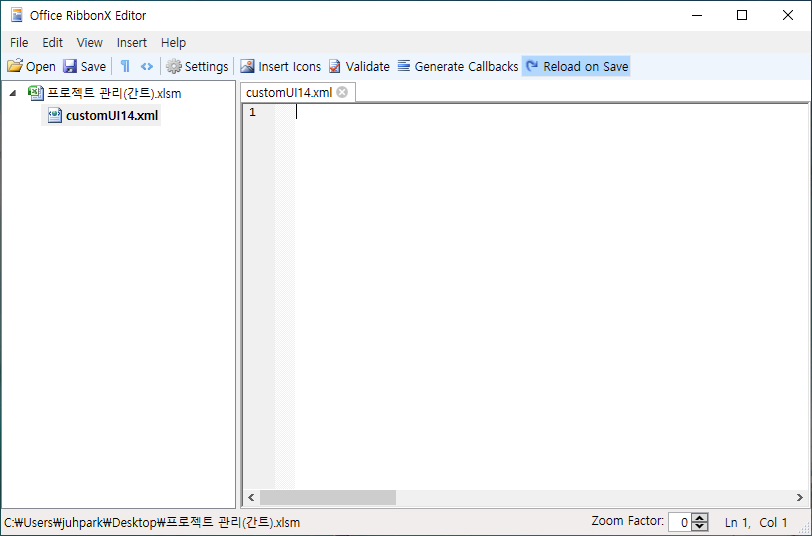
설치후 실행하면 다음과 같은 창이 뜬다.

위 편집기를 사용하여 엑셀파일을 열면 비어있는 customUI14.xml 파일이 자동으로 생성된다.
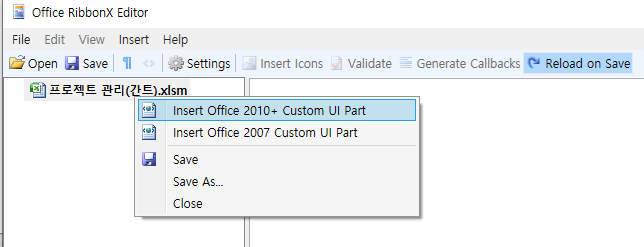
리본바를 변경하고 싶은 파일(xlsm)을 열고 커스텀 리본을 만들기 위해 마우스 오른쪽 클릭을 하여 맨 위 메뉴를 클릭하면 비어 있는 customUI14.xml 파일이 생성이 된다. 이 엑셀 파일만 편집하면 원하는 리본바 메뉴의 생성이 가능하다.
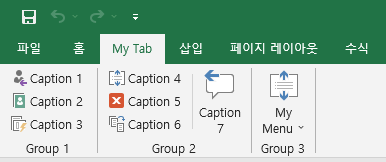
아래와 같은 코드를 삽입후 엑셀 파일을 다시 열면 My Tab 이라는 리본 탭이 생성된다.
<customUI xmlns="http://schemas.microsoft.com/office/2006/01/customui">
  <ribbon>
    <tabs>
      <tab id="MyCustomTab" label="My Tab" insertAfterMso="TabHome">

  	  <group id="customGroup1" label="Group 1">
          <button id="customButton1" label="Caption 1" size="normal" onAction="Macro1" imageMso="DirectRepliesTo" />
          <button id="customButton2" label="Caption 2" size="normal" onAction="Macro2" imageMso="AccountMenu" />
          <button id="customButton3" label="Caption 3" size="normal" onAction="Macro3" imageMso="RegionLayoutMenu" />
        </group>

        <group id="customGroup2" label="Group 2">
          <button id="customButton4" label="Caption 4" size="normal" onAction="Macro4" imageMso="TextAlignGallery" />
          <button id="customButton5" label="Caption 5" size="normal" onAction="Macro5" imageMso="PrintPreviewClose" />
          <button id="customButton6" label="Caption 6" size="normal" onAction="Macro6" imageMso="PrintPreviewShrinkOnePage" />
          <separator id="MySeparator1" />
          <button id="customButton7" label="Caption 7" size="large" onAction="Macro7" imageMso="ReviewPreviousComment" />
        </group>
        <group id="customGroup3" label="Group 3">
          <menu id="MyDropdownMenu" label="My Menu" size="large" imageMso="TextAlignGallery"  >
            <button id="customButton8" label="Caption 8"  onAction="Macro8" imageMso="TextAlignGallery" />
            <button id="customButton9" label="Caption 9"  onAction="Macro9" imageMso="TextAlignGallery" />
            <button id="customButton10" label="Caption 10"  onAction="Macro10" imageMso="TextAlignGallery" />
            <button id="customButton11" label="Caption 11"  onAction="Macro11" imageMso="TextAlignGallery" />
            <button id="customButton12" label="Caption 12"  onAction="Macro12" imageMso="TextAlignGallery" />
          </menu>
        </group>

      </tab>
    </tabs>
  </ribbon>
</customUI>
아래의 각 버튼을 클릭하면 오류가 발생하지만 위 xml 파일의 onAction 에서 지정된 매크로 함수를 만들어주면 동작을 한다. 한가지 중요한 것은 매크로 파일을 만들때 아래와 같이 control As IRibbonControl 변수 입력이 되어야 한다.
Sub Macro1(control As IRibbonControl)
   MsgBox "test"
End Sub
리본바를 구성하는 아이콘은 주로 엑셀에 기본으로 제공하는 아이콘을 사용하는데, 이미지와 그 이름을 확인하려면 다음의 사이트를 활용하면 된다.
https://bert-toolkit.com/imagemso-list.html
BERT | ImageMSO List Reference
bert-toolkit.com
이제 나도 엑셀 프로그램을 본격적으로 만들어 볼까 ㅎㅎ
'Programming > VBA(Excel)' 카테고리의 다른 글
| VBA 엑셀에 공공데이터 휴일정보 읽어오기 (0) | 2024.05.02 |
|---|---|
| VBA로 엑셀 시트 보호하기(Protect, Unprotect) (0) | 2024.04.18 |
| 엑셀 리본바의 버튼 컨트롤 상태(Pressed, Visible) 관리하기 (2) | 2024.04.10 |
| 엑셀의 원하는 sheet를 변수에 담기 (0) | 2023.07.12 |
| 엑셀의 개발자 도구 사용해보기 (0) | 2023.07.11 |